Demo Location Route Guide

Playground Route Guide

Playground contains the biggest difficulty increase in the demo and several speedrun-relevant landmarks.

Target Split (Safe)
2:30 – 3:30
Target Split (Speedrun)
1:10 – 1:35
Elevation Delta
+142 Meters
Difficulty Rating
4 / 5 (Advanced)
Major Transitions
Gateway → Cozy Area → Microwave Chasm → Summit
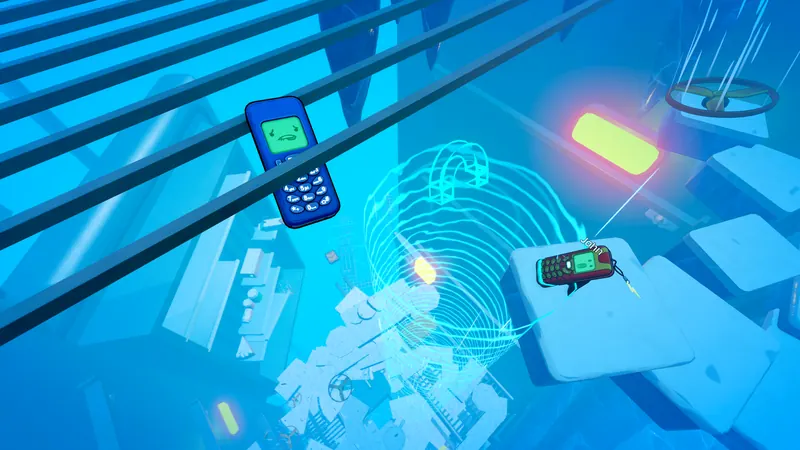
Playground Route Guide In-Game Landmark
🎮 Visual Landmark: Playground Route GuideOfficial Steam Release Screenshot · Elegant Horse Studios

Playground is the crowning challenge of the demo—a towering, vertical playground labyrinth filled with swing ropes, microwave ledges, spring-loaded booster pads, and catastrophic multi-tier fall hazards. This zone represents over 50% of the total demo length.

Mastery of Playground requires combining every skill drilled in the earlier levels: camera discipline, momentum preservation, wall-jump precision, and emotional composure when standing hundreds of feet in the air.

Section-by-Section Walkthrough

Section 01

Tiny Castle & The Rope Traverse

🛡️ Safe Route

Ascend the wooden toy blocks of Tiny Castle. Settle on the rope anchor beam. Use measured hops across the suspended ropes.

⚡ Speedrun Line

Leap off Tiny Castle roof directly to the second rope knot with a full forward momentum whip, cutting across the gap.

🎯 Visual Anchor: Align camera with the yellow rope weave texture; land directly on the knot nodes rather than the thin spans.
Section 02

The Cozy Area & Booster Pads

🛡️ Safe Route

Bypass booster pads and take the stable shelf route along the bookshelf edges and stacked textbooks.

⚡ Speedrun Line

Hit the green spring booster pad with a buffered 0.3s vibration charge, rocketing upward across the chasm directly to the microwave.

🎯 Visual Anchor: Center your phone directly over the glowing circular icon on the booster pad before release.
Section 03

The Microwave Chasm & High Perches

🛡️ Safe Route

Use the microwave door handle as a intermediate stepping stone. Settle on top of the microwave casing before tackling the upper beams.

⚡ Speedrun Line

Perform a double wall-kick between the microwave side panel and the room wall to vault directly to the upper pyramid approach.

🎯 Visual Anchor: The digital clock display on the microwave ("12:00") marks the exact horizontal centerline for landing.

Hazards & Fallback Recovery Perches

⚠️ Rope Sways & Narrow Knots

Missing a rope knot drops you 40 meters down to the Playground floor.

🛟 Emergency Catch: The yellow playmat foam tiles beneath Tiny Castle catch falls from the early rope section.

⚠️ Booster Pad Over-Shooting

Misaligning your camera on a booster launches you into the wall at extreme velocity, causing massive deflection.

🛟 Emergency Catch: The wide open bookshelf directly beneath the microwave catches long booster overshoots.

💡 Zone Speedrunner Tips

  • Break Playground into three mental zones: Castle, Cozy Area, and Upper Chasm. Never focus on the summit while still on the ropes.
  • Booster pads preserve whatever rotation you enter them with. Enter booster pads completely upright to avoid chaotic aerial tumbling.
  • If you slip in the microwave section, immediately turn camera downwards to locate the wide textbook stack.

❓ Frequently Asked Questions

Are booster pads required to beat Playground?No! The safe route provides standard platforming ledges around all boosters; boosters are optional speedrun tools.
How do I avoid over-rotating off the microwave?The microwave top has a smooth metal texture with low friction. Land with screen facing flat and avoid touching movement keys upon impact.
Level names, geometry markers, and structure follow the public Steam demo build v1.0.4. All route walkthroughs, visual cues, and recovery advice are independently researched and maintained by flippingishard.com.