Demo Location Route Guide

How to Pass the Playground Pyramid

The Pyramid is a precision wall-jump sequence. Consistent setup matters more than fast inputs.

Target Split (Safe)
1:00 – 1:30
Target Split (Speedrun)
0:25 – 0:35
Elevation Delta
+55 Meters (Summit)
Difficulty Rating
5 / 5 (Expert)
Major Transitions
Pyramid Base → Triangular Wall Ascents → Demo Final Goal
How to Pass the Playground Pyramid In-Game Landmark
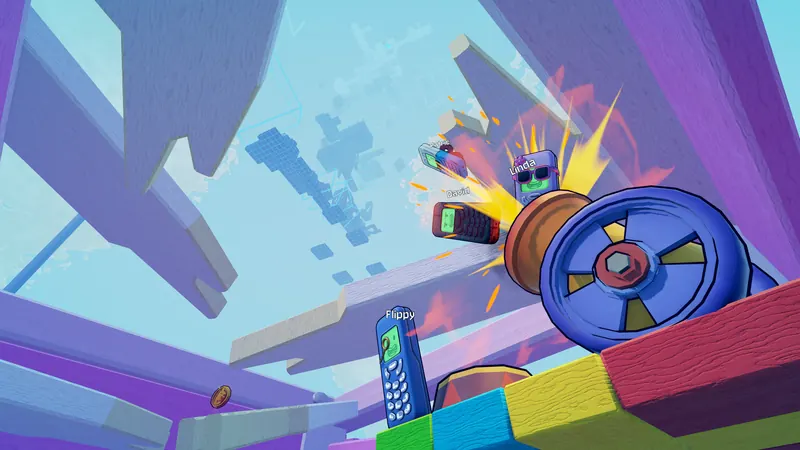
🎮 Visual Landmark: How to Pass the Playground PyramidOfficial Steam Release Screenshot · Elegant Horse Studios

The Playground Pyramid is the infamous gatekeeper of the demo. Perched at the apex of the Playground, this steep geometric structure features sloping triangular faces and sequential precision wall-jump ascents.

A single mistake on the upper tiers of the Pyramid carries the devastating risk of sliding down the sheer face and plunging all the way back to the Playground floor. Passing the Pyramid requires absolute calmness and methodical execution.

Section-by-Section Walkthrough

Section 01

Pyramid Base Approach & Camera Settle

🛡️ Safe Route

Stand on the wide approach shelf at the base of the Pyramid. Settle camera at a 35-degree upward angle looking at the first tier seam.

⚡ Speedrun Line

Sprint onto the approach ledge and launch an immediate 45-degree angled vibration jump onto the lower tier face.

🎯 Visual Anchor: Align your view with the triangular junction line where the two front faces meet.
Section 02

The Tiered Slanted Facet Climb

🛡️ Safe Route

Each tier offers a narrow 20cm horizontal ledge between sloped facets. Use single vertical vibration jumps; do not hold forward in air.

⚡ Speedrun Line

Utilize continuous alternating wall-kicks on the corner facet edges, climbing the pyramid diagonally like a staircase.

🎯 Visual Anchor: Watch for the brass screw studs located at the corners of each tier; they mark stable horizontal flat spots.
Section 03

The Apex Pinnacle Touchdown

🛡️ Safe Route

The summit pinnacle is narrow. Charge 100% vibration from tier 3, release straight up, and perform a single 180-degree flip to land flat on the final victory pad.

⚡ Speedrun Line

Apex momentum dive straight through the victory trigger volume without coming to a complete stop.

🎯 Visual Anchor: The glowing green finish flag at the pinnacle emits a visible particle beacon.

Hazards & Fallback Recovery Perches

⚠️ Sloped Face Slide-Off

Touching down on the 60-degree sloped face causes an uncontrollable slide down the structure.

🛟 Emergency Catch: If you begin sliding, immediately steer towards the central facet junction crease where friction is highest.

⚠️ Apex Over-Jump

Over-charging jump 3 shoots past the pinnacle into empty air behind the pyramid.

🛟 Emergency Catch: The secondary pyramid tier shelf behind the pinnacle catches moderate over-jumps.

💡 Zone Speedrunner Tips

  • On the Pyramid, vertical altitude matters more than forward distance. Favor 90-degree straight-up jumps over diagonal reaches.
  • Never touch directional keys during a slide down a pyramid face; wait until you hit a horizontal ledge to regain control.
  • Practice the Pyramid in Chill Mode until you can climb it 5 times in a row without sliding off.

❓ Frequently Asked Questions

Why do I keep sliding off the pyramid faces?The triangular faces are steep inclines. You must land precisely on the narrow horizontal shelves between tiers, not on the sloped glass faces.
What is the safest camera angle for the Pyramid?Keep the camera tilted upward at 30-40 degrees, aligned squarely perpendicular to the face you are currently climbing.
Level names, geometry markers, and structure follow the public Steam demo build v1.0.4. All route walkthroughs, visual cues, and recovery advice are independently researched and maintained by flippingishard.com.